Staining Hardwood Floors: Transforming Your Home with Warmth and Style
 Hardwood flooring has long been a favourite among homeowners, designers, and tradespeople across the United Kingdom for its timeless elegance and lasting durability. However, over the years, even the most premium wood floors can begin to look a little tired or outdated. That’s where staining hardwood floors comes into play—it offers a cost-effective, impactful way to revitalise your space and completely alter its aesthetic without the need for a full floor replacement.
Whether you’re a DIY enthusiast shielded with sanding tools on a weekend revamp mission, a young professional craving a sleek modern look, or a tradesperson sourcing options for a client, understanding how and why to stain hardwood flooring will help you achieve stunning, floor-to-ceiling cohesion. In this article, we’ll guide you through everything from choosing the right stain to executing the perfect finish to wow your guests—or clients.
Why Stain Hardwood Floors?
Over time, hardwood floors may fade, yellow, or become patchy due to sun exposure, wear, and cleaning products. Staining not only revives the colour and depth, but allows for a complete aesthetic transformation. Want to go from bright oak to rich walnut or from traditional brown to a trendy grey wash? Staining gives you that flexibility and design freedom.
For those who’ve recently purchased a home, staining the floors can be a game-changer in establishing your personal style. Similarly, property developers and architects often turn to staining as a way to increase property value and marketability. A beautiful, well-finished floor makes a powerful first impression.
Most importantly, staining adds an extra layer of protection against wear and tear. When used in conjunction with a good-quality sealer, it promotes water resistance and extends the life of the flooring by creating a barrier between the wood and the elements of daily life.
Choosing the Right Stain for Your Project
Stains come in a vast array of colours and formulations. Choosing the right type of stain hinges on several factors including wood species, desired colour, room lighting, and usage. Let’s break down the main types:
| Stain Type | Benefits | Best For |
|---|
| Oil-Based Stain | Deep penetration, rich colour, easy to apply | DIY homeowners, deep colours |
| Water-Based Stain | Quick drying, low odour, environmentally friendly | Tradespeople with tight timelines, eco-conscious clients |
| Gel Stain | Even application, great for vertical surfaces | Feature floors, stairs, uneven grain |
| Hybrid/Water-Oil Stains | Best of both worlds – rich colours and faster drying times | Designers needing precision and consistency |
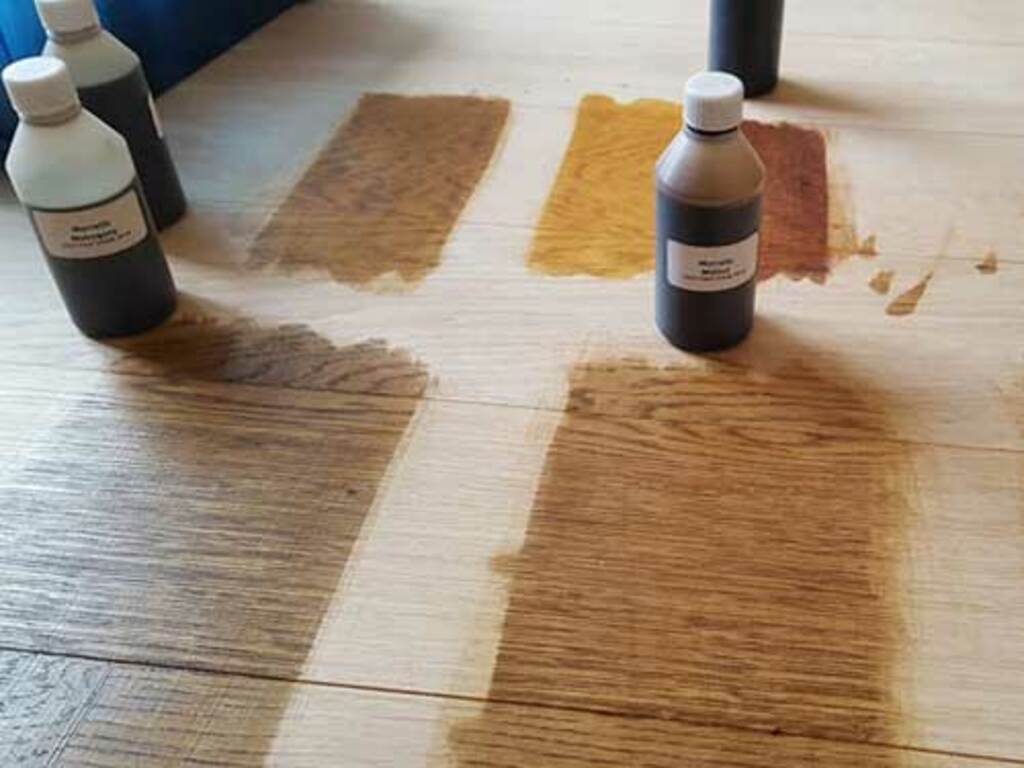
Before making your final selection, always test the stain on a hidden section of the floor. Wood varieties absorb colour differently, and the lighting in your room can alter the stain's tone. A test patch ensures that the finish matches your vision before you take the plunge.
Preparing Your Hardwood Floors for Staining
Proper preparation is the foundation of a flawless finish. Start by removing all furnishings, coverings and fittings from the floor. If you're working on a renovation, make sure to do any messy construction work beforehand to avoid re-sanding clean floors. Sweep and vacuum thoroughly to clear all debris.
Next up: sanding. This is arguably the most critical stage of the process. The floor’s old finish must be completely removed to allow the stain to penetrate evenly. Use a drum sander for larger areas, and an edge sander for corners and edges. Aim to sand down to bare wood using a sequence of grits (typically, 40, 80, then 120-grit paper) to ensure smoothness and proper absorption.
Once sanding is complete, vacuum again and use a tack cloth or microfibre to remove any remaining dust. Think of your floor like a blank canvas—it needs to be clean and raw to accept the new colour properly.
How to Apply the Stain Like a Pro
Staining hardwood floors demands patience and attention to detail. Begin at the farthest corner of the room and work your way towards the door to avoid painting yourself into a corner—literally.
Apply the stain using a lint-free cloth, lambswool applicator, or foam brush, depending on the size of your project. Work in small sections and always follow the grain of the wood. It’s crucial to maintain a wet edge to avoid lap marks or inconsistencies. When staining, less is more—apply it generously then wipe off excess with a clean cloth within 5-15 minutes (depending on product instructions and desired darkness).
Allow the stain to dry thoroughly. Drying times vary greatly depending on the type of stain, wood species, humidity, and temperature. Oil-based stains may take 24-48 hours, whereas water-based variants can be dry in as little as 2-4 hours. Avoid walking or placing items on the floor until it’s fully dry to prevent imperfections.
Sealing and Protecting the Finish
Once the stain is dry and you’re satisfied with the colour, it’s time to seal the deal with a protective top coat. You can choose between polyurethane (oil or water-based), natural wax, or penetrating oils to preserve the beauty and durability of your newly stained floors.
Polyurethane sealers are the most popular option and come in finishes ranging from ultra-matte to high-gloss. Water-based polyurethanes are fast-drying, low-odour, and won’t amber over time, making them ideal for lighter stains. Oil-based polys, although slower to dry, offer superior durability and a rich, warm tone that complements darker finishes.
Apply two to three thin coats using a synthetic bristle brush or foam roller, lightly sanding between coats to remove any imperfections. Each layer should cure for the recommended time before adding another, and the room should be well-ventilated throughout the process.
Common Mistakes to Avoid
Even seasoned DIYers and professionals can slip up when staining hardwood flooring. Here are some common pitfalls and how to dodge them:
- Skipping the sanding step: Without proper sanding, the stain won't absorb evenly leading to blotchy results.
- Not testing the colour: Always perform a patch test—colours look different on various wood species and lighting.
- Overapplying the stain: Applying too much can result in a tacky, uneven surface that won’t dry properly.
- Ignoring dry times: Rushing the process between coats causes smudging and dull results. Be patient!
- Forgetting to wear protective gear: Always use gloves, eye protection, and a mask—especially for oil-based products.
Avoiding these mistakes can save time, money, and a potential redo of the entire floor. A steady hand and proper prep are your tickets to a professional-quality finish.
Final Thoughts: Is DIY Right for You?
While many homeowners and hobbyists across the UK opt to take on staining their hardwood floors as a rewarding DIY project, it isn’t without its challenges. If you’re confident with power tools and have an eye for detail, this could be an excellent weekend project. However, if your floor has significant damage, or if you're working with complex patterns, hiring a professional can guarantee enduring results with minimal risk.
Whether you’re going it alone or collaborating with a local tradesman, one thing is certain: a beautifully stained hardwood floor elevates any space. With the right preparation, products, and patience, it’s a makeover that offers instant comfort and character—combining practicality with panache.
Thinking about staining your hardwood floors? Explore our guide to the best floor stains and tools, or get in touch for a free consultation with one of our flooring experts!